Last weekend I had nothing but lots of work stretching out ahead of me—so to take breaks, I did a bunch of craft projects. And since it’s December, they all ended up being Christmas related. Now my apartment is decked out in a bunch of homemade and repurposed decorations. The best part of all this is that I literally spend $2.50 at the thrift store, total. Let me show you what I did.
Outdoors: wreaths, garlands, and bobbles

Since my cat eats anything green and growing, all my seasonal greenery has to go outside. Last year I made a wreath out of boughs from shrubbery. This year I already had a grapevine wreath on the door, so I decided to just alter it by weaving in some branches from a nearby evergreen and berries from bushes in my complex. Here’s the result!

Yes, I left up my “no solicitors” sign because it does seem to deter some of them. Also, it’s also homemade, so it fits right in. I’ll probably have to replace the berries in a week or so, but so far they’ve been holding up.
The next project took more work. I decided to make a garland for the top of my front door using more evergreen branches, mistletoe, and red bobble Chirstmas tree ornaments I got at the thrift store for $1.

 I started by wrapping up branches of evergreen and mistletoe with twine. From talking to several people recently, I realize that the source of mistletoe may not be common knowledge. It’s a parasite, and it grows on a lot of deciduous trees around here. If you see a green bush like thing growing straight down on a tree branch on a tree that has lost its leaves—congratulations, you’ve found mistletoe.

Anyway, I wrapped three separate bundles—one leaning left, one leaning right, one that was just straight.

Then I attached them above the door frame using what I had on hand. For the left and right leaning bundles, I used cup hooks. I suggest using a nail of slightly smaller size to make a pilot hole, then twisting the cup hook into the hole.

 Here’s what that looked like once they were up. Kinda weird without the middle part to connect it.

 For the middle part I used what I think is called a fencing staple—basically a U-shaped nail with no head but two points. For some reason I had one lying around. I just hammered it in over the middle part of the bundle and then pulled the greenery over it to over it.

 Finally, I added the red bobble ornaments. I was seriously winging it at this point, but I ended up removing the top wire portion, jamming some floral wire into the opening, then securing that with duct tape. I know, duct tape! But the silver looked a lot like the top of an ornament would, I think.

 Repeat for both ends of the floral wire, wrap it securely around a branch, and there you have it! I would have done three bobbles but my box of ornaments was missing one and I needed three for the last outdoor project. I still like how it looks! After this photo I trimmed the branches to make the sides a little more even.

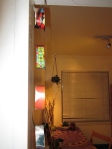
Finally, I decided that I really enjoyed the bats in the window decorations I made for Halloween. So did basically the same thing, but this time, with red bobble ornaments.

While this was easy to set up (I already had yarn to tie onto the ornaments and nails installed to hang them from), it is also one you have to be careful with. If I did not have a small apartment and a cat that chases all dangly things, I would put these inside. Because when it’s windy, these ornaments tap against the window. If there is a crazy windy storm, I will have to bring them inside because they are ancient and would probably break. But for now, they are looking great.

Indoors: paper chains and advent calendars
Ok, first of all, I do have some non-paper decorations up on top of my bookcases, pretty much the only free spaces in my home.

This little tree and ornaments came from my family’s massive stash of Christmas decor. It goes on the tall bookcase every year, where it is hard for my cat to find it.

I also added some pine cones and a really old copy of A Christmas Carol to the top of the small bookshelf. I was hoping I could find my own pine cones, but no such luck, so these were $1.50 from the thrift store. The book was my grandfather’s—writing in the inside says “Christmas ’44” and the book itself is from 1938. It has some beautiful illustrations.
On to the paper crafts!

First up—a paper chain. For some reason I loved making these in elementary school. But I decided to ditch the red and green construction paper for strips from magazines and catalogs. It was a lot more colorful this way. I did try to get some red and green in there though. I didn’t really measure the strips—they were all about an inch by 6 or 7 inches, but it didn’t really matter.
 I ended up making 24 chains, because I had this idea that it could be an advent calendar paper chain. But then I decided I didn’t want to put numbers on them or break one of them off everyday, so it’s more of a decoration. I hung it on the entryway to the kitchen. It was surprisingly hard to photograph.

But the paper chain inspired me to make a real advent calendar. On a whim. With no plan. And so I did. Below are most of the tools and supplies you need (except for the exacto knife and cutting mat, which I also ended up using).

I started out with an old calendar that I liked and the magazine and catalogs from before. I measured the size of the box under each number, made a template, and then cut out lots of little rectangles for each day and glued them to the calendar. It would be super easy if you had a glue stick, but I used elmer’s glue and a paintbrush.

 Once that dried, I worked on the overlay part. I measured an even smaller square for each day, and traced three sides of it onto some strips of nice green stationery paper I had. Using an exacto knife, I cut the three sides of the rectangle out so that each day would have a little door flap to open. When I had enough for all 24 days, I glued them over the calendar boxes, being careful not to glue the flaps down!


 Finally, I covered up the days of the week and the year on the old calendar…and it was done!

I was quite pleased with the results, especially because this was the one craft I did not make for myself—it was a gift for a friend. Because the only thing more exciting than opening those little calendar doors as a kid was not knowing what was behind them.
 I think I’m done with Chirstmasing for a while now…at least until my yarn comes in the mail and I can start knitting little gifts.
